All day, the blogger website hasn't allowed me to add the pictures from this morning!
I managed to take a few pictures of the first (nearly) full primer coat. The only area left is around the hole in the steering cast and the area where the oil ran down the tractor! I have spoken to Gibson at work- who is obviously a specialist on liquid steel - as he rides a KTM, and therefore used to fixing broken machines :)
He reckons the liquid steel idea will be sweet as long as I do the knead preparation properly. I can't face any work today, after yesterday's epic- but I did just go over and clean up the excess oil and brush the metal back to shiny. I'm hoping there is an easy solution to getting the oil back in there once it is all sealed up.
You can see the tractor body in the below pictures starting to look good. You can also see the dust on the rear part from cleaning up the front area before the priming. I have brushed this off this evening- so there is an even redness. Once I have coated the area around the oil leak, I am going to do a full second coat of primer- should look pretty nice!

The engine block cover has a number of aluminium plates attached, but there are so degraded, they are just metal. I have decided to paint over them and then attach new covers over the top if I can find them.

The hydraulic spring area at the back is looking a lot better with a coat of primer. At a later point, when the tractor is running, I am planning to drive it up to Meeks' metalworks and Dan has said they have the tools to get the top pin out. Then we can re-clean this up and get a nice new pin in place. Just need to get the beast running first!

I took off the rubber boots on the track rods prior to painting, and also cleaned out the grease from underneath. I received new rubber seals today- so they will look nice when they go back on. However, these finishing touches I am planning to put on after the grey spray.

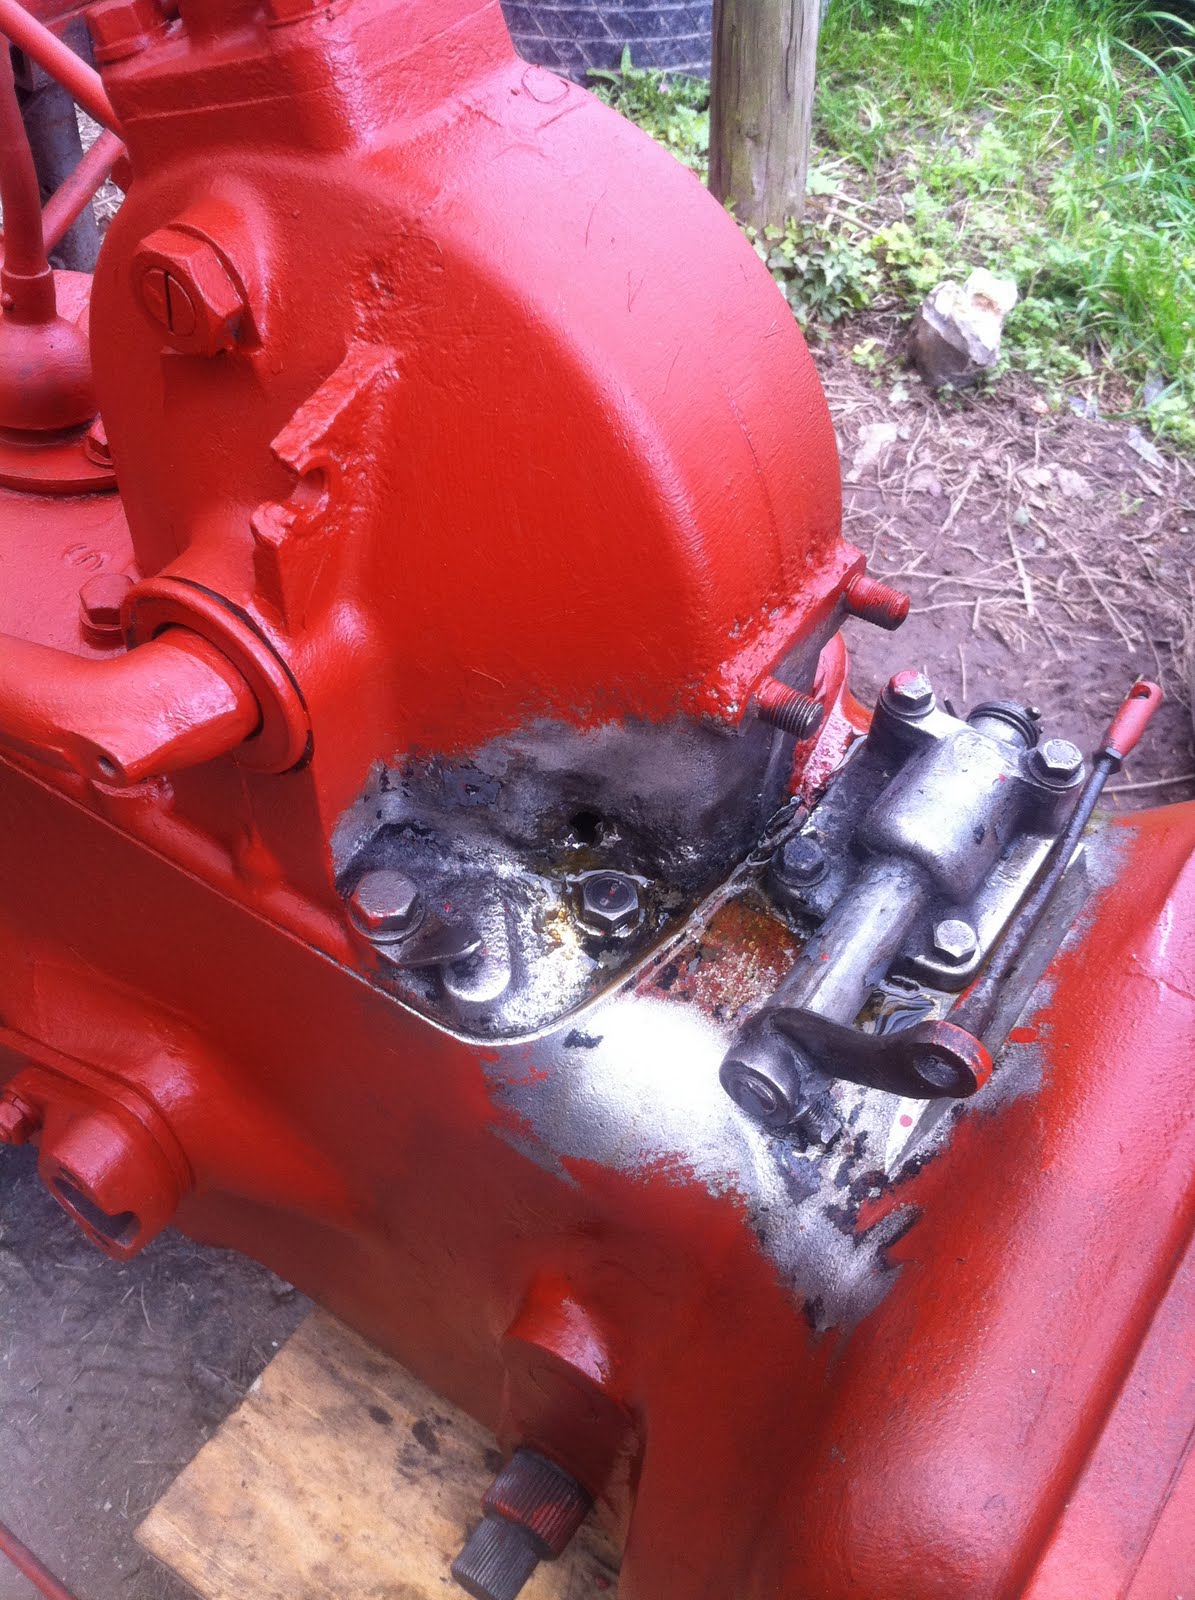
You can see on the below picture the extent of metal damage on this section. look at the drilled hole to connect to the dash area on the left- it is totally broken off the tractor body. fortunately there is enough to hole a bolt and nut, so should be ok to use when we put the tractor dash back together. The cross shaft is also damaged on the tractor, and only really noticed how damaged when I was doing the priming. I have however, found on ebay one from a breaker tractor- so am hoping to win that and replace the broken part.
So, all good progress and am feeling a lot better about the hole- now I have a plan and a potential solution.
The next set of immediate jobs are as follows:
-- Fix the hole with liquid metal and sand flush
-- Replace the tractor cross shaft and prepare and prime
-- Put in the water thermostat and top pipe piece
-- cork gasket for the rocker cover
-- Clean up the end of the front axles and disconnect the wheels
-- Prime up the axle ends and reattach with new axle bolts
-- Recoat the whole tractor in a second primer application
Once that is done, I am thinking I will probably progress on to rebuilding the dash area. This will involve the grind and prime approach and then the full reconstruction on the tractor body. I know this will be difficult as there are so many nooks and crannies in the metal work- so I think the progression rate may drop as I get these more complicated jobs completed. I will also be using the liquid metal to fix the holes in the air filter- I can then get that primed up ready for reattachment on to the dash area!
It's all moving along nicely!
that metal repair should work thats what i did with my one, then filled with a light grease instead of oil so that if your seal go at a later time you wont get a leak, you fil it up from the nut at the front just below were the steering colum mounts
ReplyDeleteAwesome, thanks for the vote of confidence! Do you have any other common problems that you came up against? It may avoid me panicing, the next time something bad happens!
ReplyDeleteThank you
Ian
you wont stop panicing, but one tip but a gallon of grey paint or mix 5 liters in to one tin
ReplyDelete