Not sure why- maybe its the heat or the early start, but struggled to get motivated today. We have completed a lot of little jobs, but there are a lot of little issues at the moment.
--The rear left brake pedal is totally seized so I can't loosen it to put the battery case on.
--The hydraulic lever is rotten, and I have bought replacement parts- but the bolts are rusted together so can't get the old part off.
--The dash board wont split into two sections again due to a rusted bolt.
--The fuel line from the pump has snapped and still don't have a replacement, and doubt the replacement is correct.
--The new seat bolt is too big for the hole in the seat spring!
So, I can't clean up the dash and start rebuilding it, I can't get the battery platform on, and I can't rebuild and prime the hydraulic lever.
I need to complete the fuel system, but there are two key stoppers here:
--no fuel filter housings
--fuel line broken
--no auxiliary brackets
--probably missing fuel lines somewhere.
--need to line up the fuel pump
I also need to somehow work out the electrical system, I have a loom- but no idea what goes where. I also have the control box, again, I have no idea how the loon connects to this, or what it really controls...
So we are close to getting the tractor running, but the small issues are quite significant!
What we did do this morning:
It turns out that aftermarket parts don't quite fit! The radiator doesn't seem tall enough so the pipe at the top kinks. We have sorted this by mounting it higher, which is starting to look really good. I am planning to shorten one of the hoses to prevent the kinking at the corner. You can see this in the picture below. So we spent some time finishing this off and getting the cooling systems complete. The large bolts holding the radiator in place will be cut short at the base.
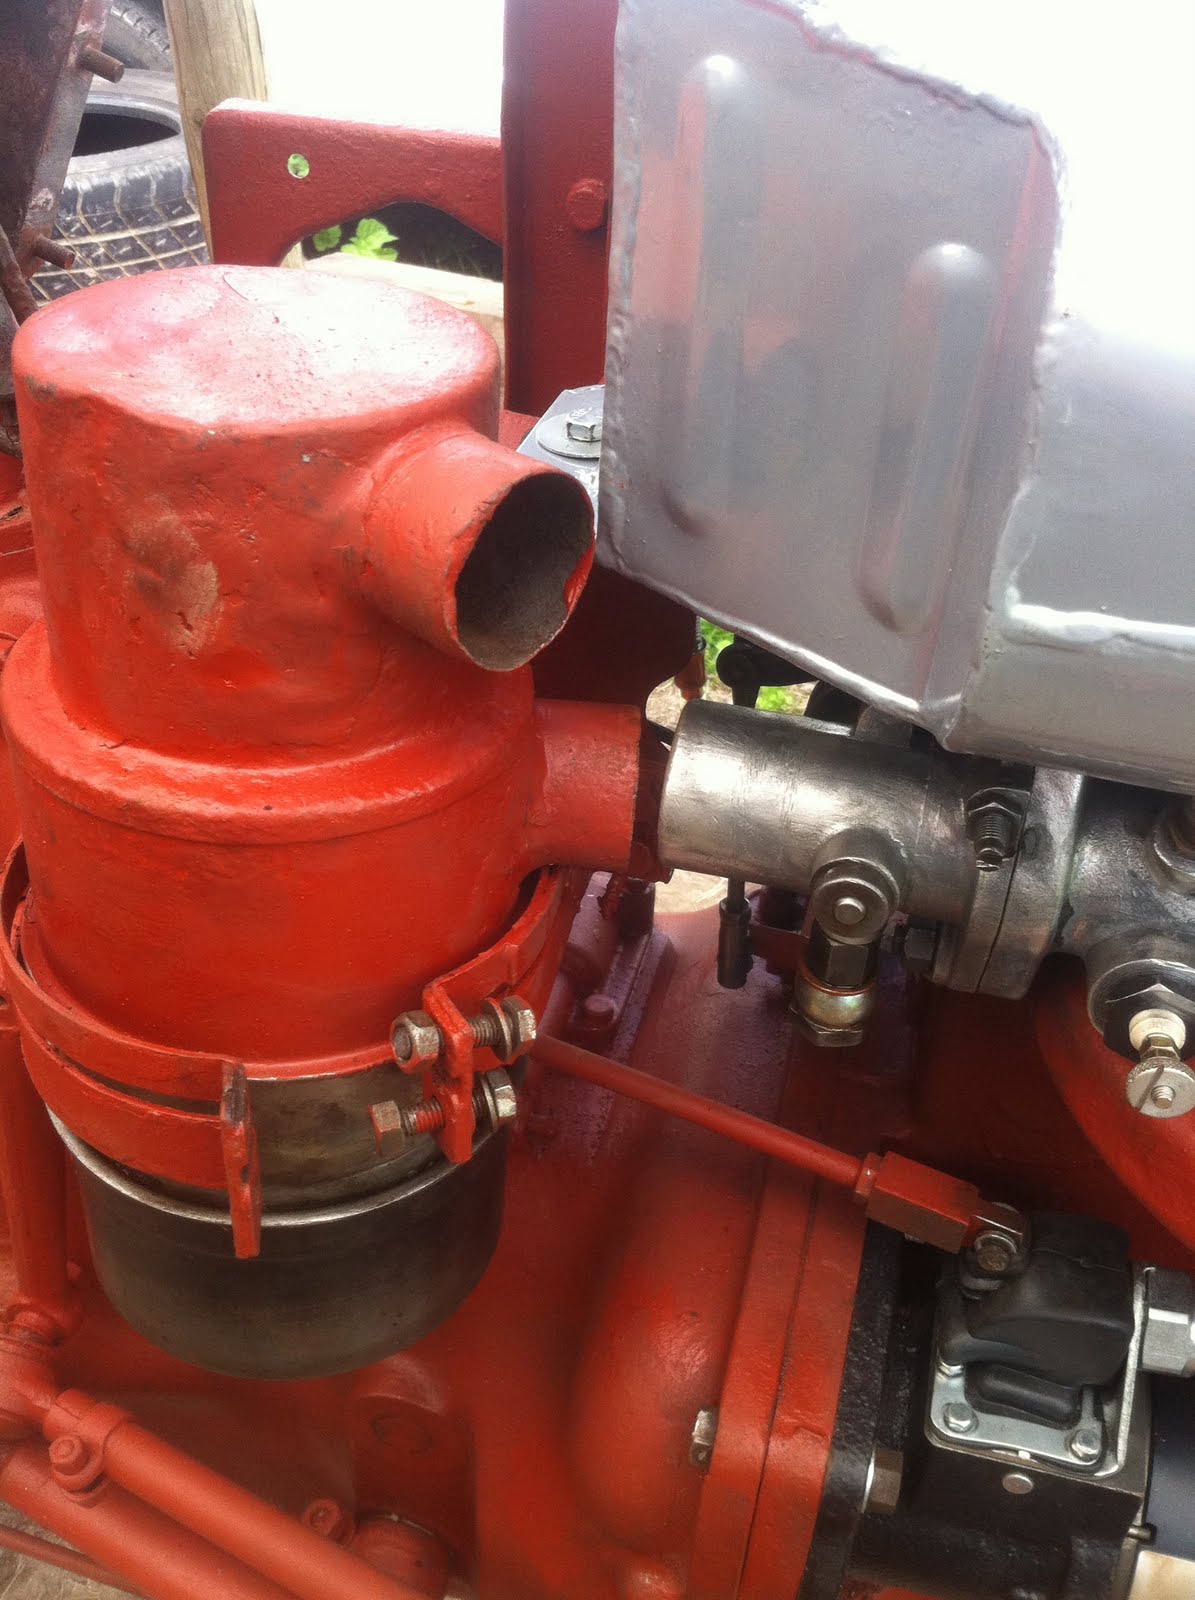
We also spent some time filling the holes in the air cleaner and priming it up- while Dan was finishing the priming I cleaned up the main dashboard mount and primed it- once dried I attached it to the tractor allowing us to connect the fuel tank.
I have also connected the cross shaft to both the throttle venturi and the idle lever on the fuel pump. It all works nicely, however I am sure there will be a number of adjustments that are required.
I have replaced the throttle lever with a shiny new one, however as always the sting in the tail is that the throttle doesn't have the eye connector to the throttle linkage. SO ANNOYING! I need to work out where to get one from...
The air cleaner fits on nicely now as the dash part holds it on to the side of the tractor. The pre-cleaner can now be connected.
There is no hose to connect the air cleaner to the inlet manifold, we need to order one of these from somewhere as again, with these things you always seem to trip up at the last hurdle!
So its been a good day, but there are loads of little annoying issues at the moment- with no obvious solutions.
Either way- focus is on building the fuel system, and the electrical system.